
Rapid Development of a Product Listing Page with NextJS Commerce

A well-designed product listing page is a crucial element of any successful online store. Users should be able to easily browse, search, and filter products, ensuring a smooth and enjoyable shopping experience. In this blog post, I will walk you through the process of quickly building a basic product listing page using Algolia and Tailwind Components in a headless build with Shopify and NextJS.
TLDR
- Integrate Algolia in NextJS Commerce for faster product listing page development
- Install the Algolia Search and Discovery in your Shopify Store
- Copy ecommerce layouts from TailwindUI
- Use useRefinementList for basic filtering
- Use useSortBy for sorting
- Working link is located here.
Scoping
The scope of the page has to meet the requirement of displaying products which aims to facilitate efficient product discovery. It will incorporate basic filtering and sort options, enabling users to narrow down their choices based on specific criteria such as size, color or product attributes.
Technologies
We are utilizing various technologies for this product listing page to expedite the entire development process of our listing page. The end result page will be located at my demo ecommerce furniture store.
- Shopify – Since this is a headless setup, this is the backend of our headless ecommerce. Moreover, they have an Algolia plugin that plays well in updating our products in our search index.
- NextJS/Commerce – This is an open source project which connects Shopify with NextJS.
- Algolia/InstantSearch – Search index tool and library for displaying products.
- Tailwind/Tailwind UI – Styling library and collection for displaying components and product cards.
Steps
The steps below assumes that you have NextJS Commerce setup already on your end. Moreover, we need to have access to our Shopify’s admin dashboard. We also need an Algolia account to setup our search index.
1. Setting up Algolia in Shopify
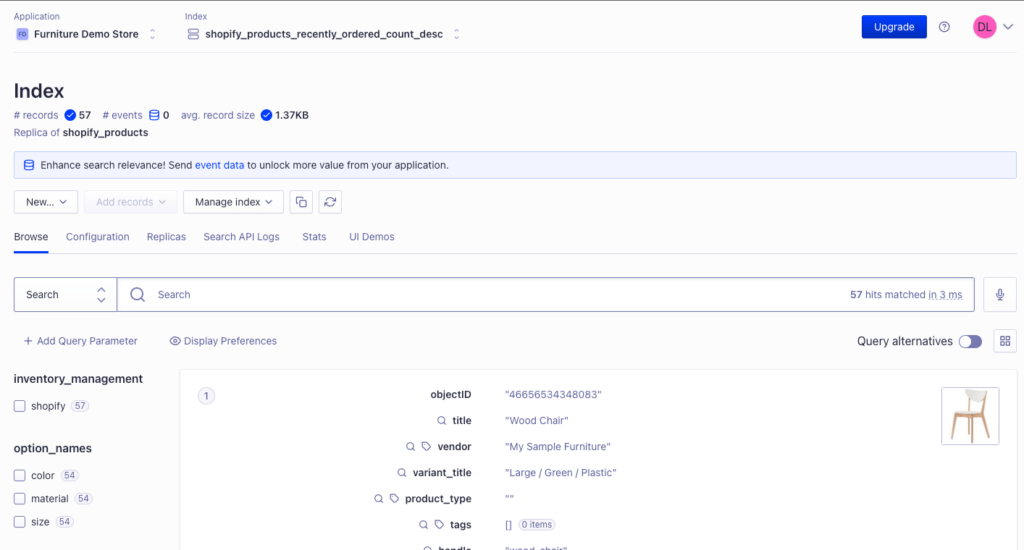
Search the Algolia Search and Discovery in Shopify’s App Store and install the app. Click the Get Started and it will attempt to authenticate you. Afterwards create or select the Algolia application you want to use. Algolia will attempt to sync your current product listing to their index. You know it’s successful once you check your Algolia application and verify the product indexes are there.
2. Integrating Algolia Instant Search
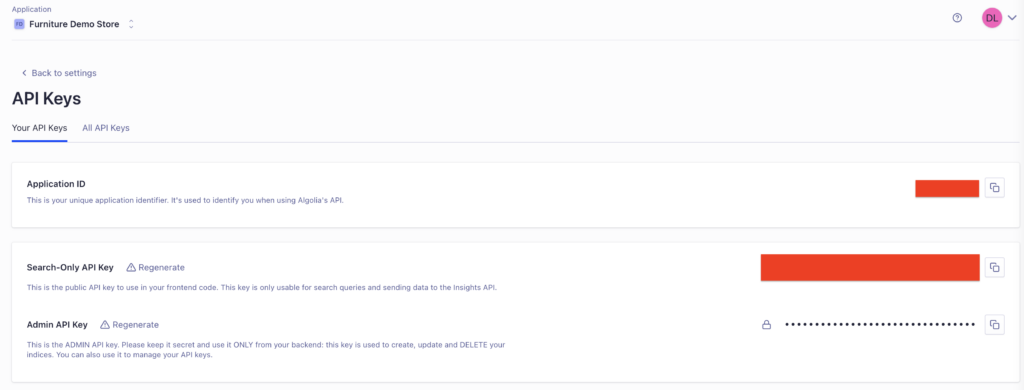
After confirming that the products have been indexed, navigate through your API keys and locate your Search-Only API Key and Application ID. This can be done by going through Settings -> API Keys.
Create a dedicated product listing page in your NextJS project and install the ReactInstantSearch library. Configure your environment variables and add the integration snippet. This is also based from their documentation. Im going straight to the hook implementation as I prefer this method to be more customizable.
// /app/lib/fragment.ts
  fragment MenuItem on MenuItem {
    id
    resourceId
    tags
    title
    type
    url
    resource {
      ... on Collection {
          id
          __typename
          image {
            url
          }
        }
      ... on Product {
          id
          __typename
          featuredImage {
            url
          }
        }
      }
  }
3. Choosing an Ecommerce Layout – Tailwind UI
The next step is flexible and dependent in your styling preference. You can write Tailwind components from scratch or use a library component. One of the ways to speed up development is to utilize a collection components. For my demo, I’ll be using TailwindUI.
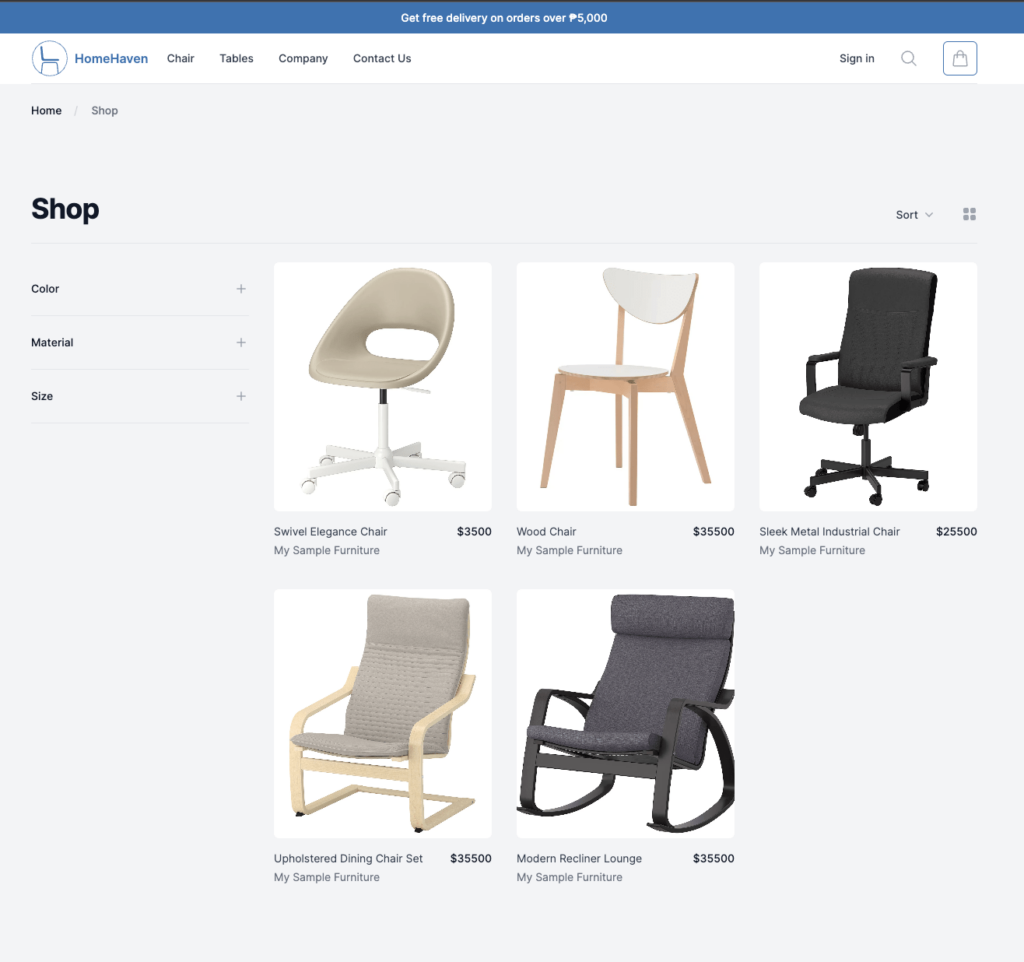
This one is paid but they have a dedicated selection for e-commerce layouts that we can utilize for our product listing page. These includes a filter section and a header section for sorting and searching.
4. NextJS Commerce with Algolia Filters
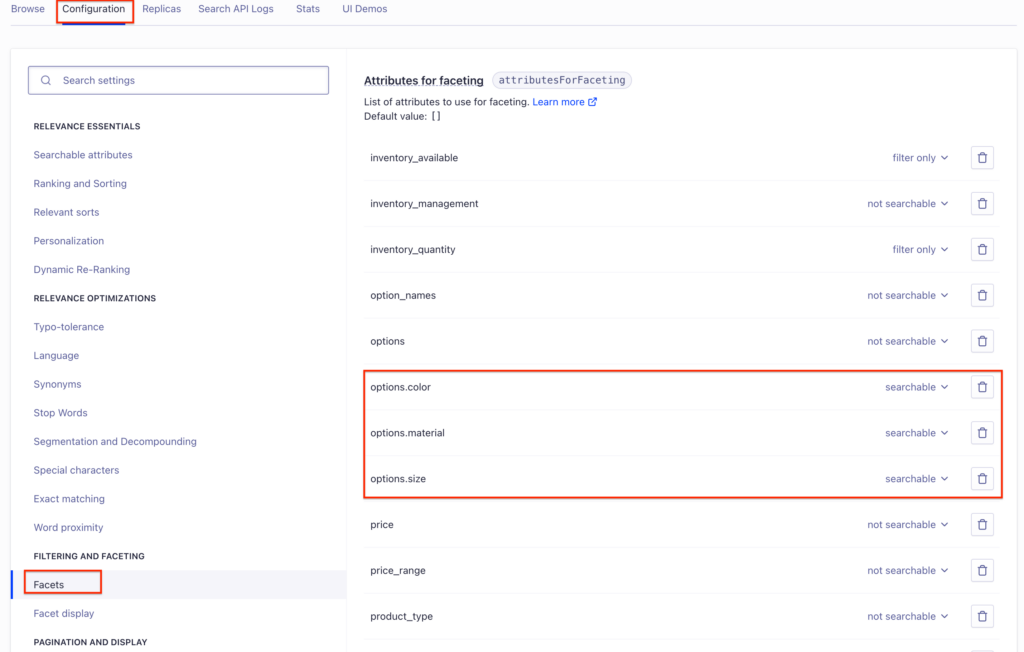
The next step is to go to Algolia to configure your facets. In your Algolia dashboard, go to your index and select Configuration -> Facets. If your desired product attributes are not present, go and click Add an Attribute to add them. Ensure that the attribute is selected as searchable.
Going back to your shop page create a component that will be utilize to display the facets. We will be using the useRefinementList hook under the InstantSearch library. You can refer to the snippet below to have a basic functioning facet.
const RenderRefinementList = (props: RefinementListProps) => {
    const { items,refine } = useRefinementList(props);

        const renderItems = items.map((item) => {
            return (
            <div key={item.label} className="flex items-center">
                <input
                id={item.label}
                type="checkbox"
                checked={item.isRefined}
                onChange={(event) => {
                    event.preventDefault();
                    refine(item.value);
                }}
                className="h-4 w-4 border-gray-300 rounded text-indigo-600 focus:ring-indigo-500"
                />
                <label htmlFor={item.label} className="ml-3 text-sm text-gray-600">
                {item.label}
                </label>
            </div>
            );
        });

    return (
        <div className="space-y-4">
          {renderItems}
        </div>
    );
}
Afterwards, call the component with the attribute assigning them the facet name. You can also have an array of the desired facets and loop through them to render each accordingly.
{sectionFilter.map((filter) => {
  return(
    <div key={filter.id}>
      <span>{filter.label}</span>
      <RenderRefinementList attribute={filter.algoliaAttribute} />
    </div>
  )
})}
5. NextJS Commerce with Algolia Sort
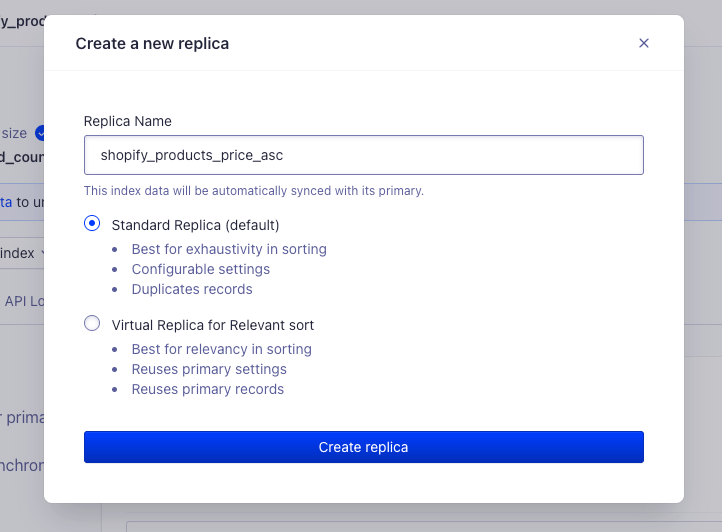
One of the wonders of using this tech stack is how easy it is to integrate certain functionalities. For the sort function, the first step is to create a replica index. In your Algolia dashboard, go to Replicas -> Create Replica Index. Assign a useful name like shopify_product_price_asc, select standard replica and click create replica.
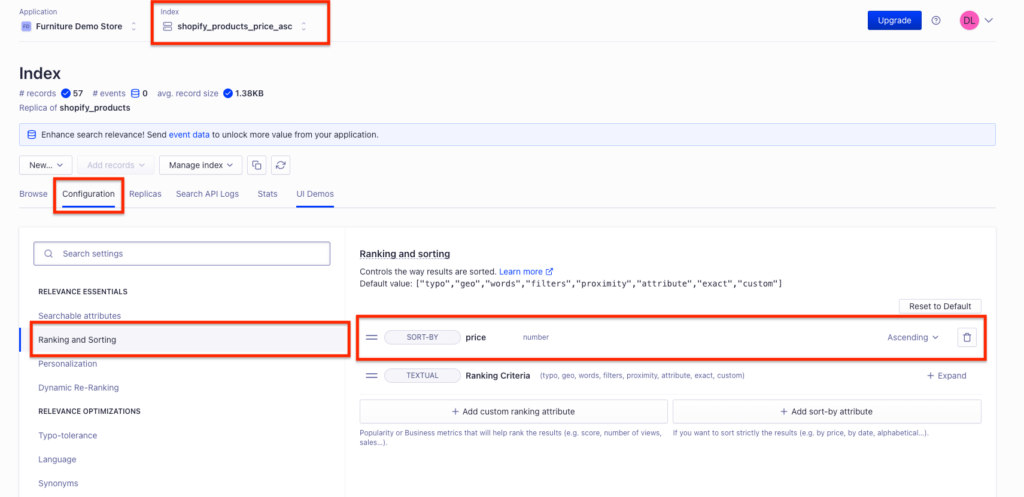
Go to the assigned replica and select Configuration -> Ranking and Sorting. Click add sort-by attribute and select price. Assign a configuration of ascending since we are configuring this as the ascending replica. Repeat these steps in creating a replica with the descending attribute to it.
Back to your code, we will utilize the useSortBy hook provided again by Instant Search. Create a component again using this hook. You can refer to the basic code snippet below. Eventually you can apply your own styling for this component.
const RenderSortBy = (props: UseSortByProps) => {
  const { currentRefinement, options, refine } = useSortBy(props);

  return (
    <select
      onChange={(event) => refine(event.target.value)}
      value={currentRefinement}
    >
      {options.map((option) => (
        <option key={option.value} value={option.value}>
          {option.label}
        </option>
      ))}
    </select>
  );
}
<RenderSortBy items={[
{value: 'shopify_products', label: 'Alphabetical'},
{value: 'shopify_products_price_asc', label: 'Price: Low to High'},
{value: 'shopify_products_price_desc', label: 'Price: High to Low'}]
}></RenderSortBy>Conclusion
If you are looking ways to rapidly develop a working product listing page then this tech stack (NextJS Commerce Algolia Instant Search) can be utilized. All-in-all, development time took 16 hours to integrate all the necessary pieces.
The sort and filter function is just the tip of the iceberg. We can easily implement more features such as search and pagination to enhance this listing page. I will create a separate blog post on how to integrate these features eventually.
While this demo just uses the free tier of Algolia, we have to consider scaling. We have to be mindful at the end of the day that we are relying to a paid indexing service. On huge amount of records in the index, ensure that the project has enough budget to support the basic operations. This link can help you predict the costing with Algolia.